开源工具集
OpenVPN
IPSecVPN
ELK日志分析平台
elasticsearch
kibana
logstash
filebeat
Loki日志分析平台
蓝鲸
麦聪DaaS
SQLynx
Spug(运维平台)
JumpServer(堡垒机)
DataEase(数据分析)
1Panel(运维管理面板)
MeterSphere(持续测试)
Syncthing同步神器
matomo(网站访问统计系统)
Yapi接口管理平台
Sentry前端监控平台
Frp内网穿透
Frp使用示例
FileBrowser轻量文件管理
code-server在线VSCODE
Swagger UI可视化API
GoReplay流量重现
GitLab代码仓库
GOGS(Git服务器)
Confluence(知识管理协作)
RouterOS路由器(MikroTik)
go-fastdfs(fileserver)
本文档使用MrDoc发布
返回首页
-
+
IPSecVPN
2021年12月14日 10:45
admin
#架构示意图 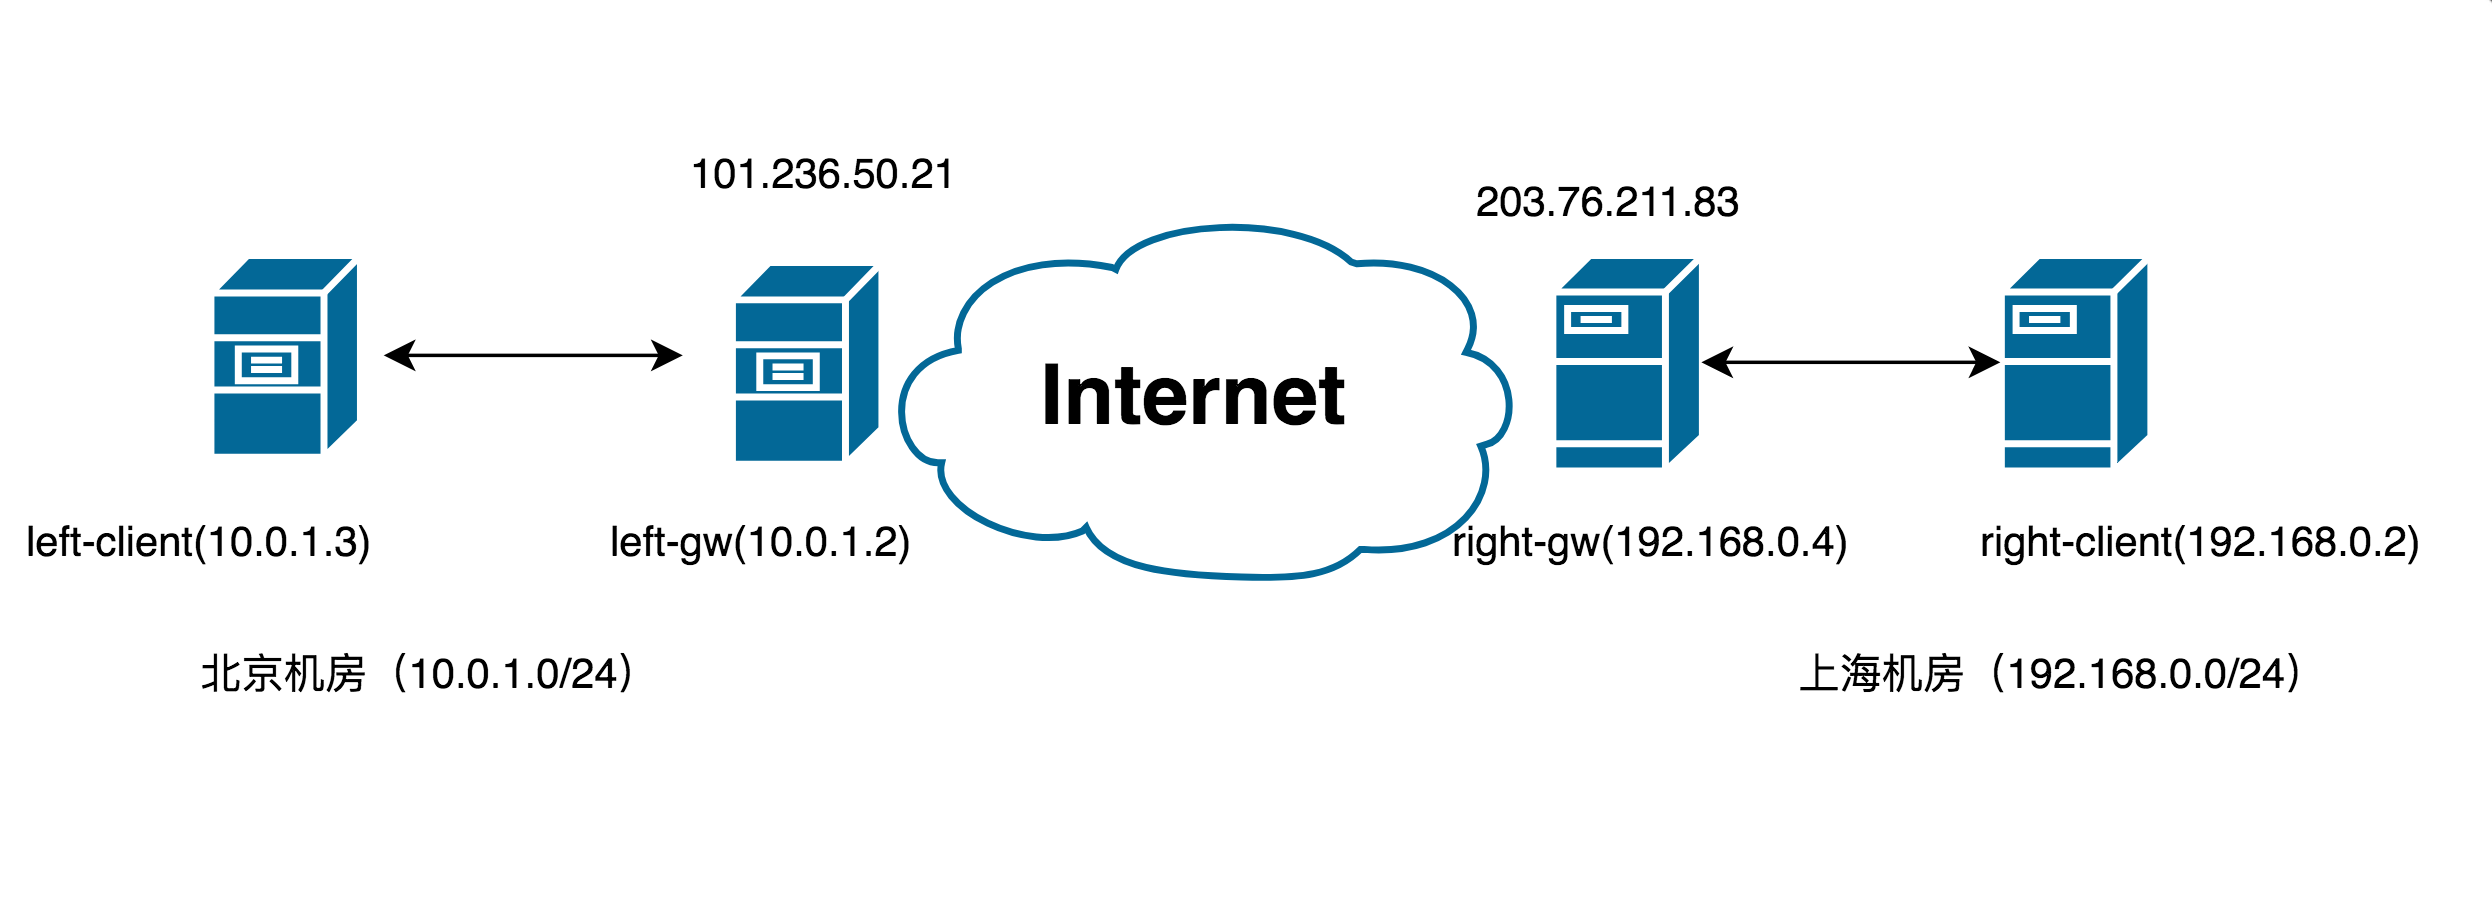 --- #重要参数 |参数|说明 |--|-- |rp_filter|成为逆向路径过滤,可以由此分析网络接口的路由信息配合封包的来源地址,来分析该封包是否为合理。举例来说,假设两块网卡eth0192.168.1.0/24,eth1为public IP。那这个封包就不合理,应予以丢弃。这个设定值建议可以启动。 |log_martians:这个设定数据可以来启动记录不合法IP来源,例如来源0.0.0.0、127.0.0.1、及IP来源。记录的数据默认放置到核心放置的登录档/var/log/message |accept_source_route|某些路由器启动这个设定值,可以取消这个设定值。 |accept_redirects|当你在同一个实体网络内假设一部路由器,但这个实体网络有两个IP网络,例如192.168.0.0/24 192.168.1.0/24 这时192.168.0.100想要向192.168.1.100传送信息时,路由器可能会传送一个ICMP redirect封包告知192.168.0.100直接传送数据给192.168.1.100即可,而不需要透过路由器。建议关闭。 |send_redirects|与上一个类似,只是此值为发送一个ICMP redirect封包。建议关闭。 #strongSwan https://cloud.tencent.com/developer/article/1505715 ##安装strongSwan yum install strongswan -y strongswan version #查看版本 --- ##配置strongSwan vim /etc/strongswan/ipsec.conf #内容: config setup uniqueids=never conn %default authby=psk 验证方式:共享密码 type=tunnel conn tomyidc keyexchange=ikev1 left=47.107.xx.xx leftsubnet=172.16.10.0/24 #左侧内网网段 leftnexthop=%defaultroute leftid=47.107.xx.xx right=120.77.xx.xx rightsubnet=172.18.43.0/24 #右侧内网网段 rightnexthop=%defaultroute rightid=120.77.xx.xx auto=start ike=aes-sha1-modp1024 ikelifetime=86400s esp=aes-sha1-modp1024 lifetime=86400s type=tunnel --- ##配置secrets vim /etc/strongswan/ipsec.secrets 47.107.96.62 120.77.178.204 : PSK test9cloud123 #内容: 47.107.xx.xx 120.77.xx.xx : PSK 共享密码 --- ##修改系统配置 vim /etc/sysctl.conf #内容: #配置转发,默认是0 net.ipv4.ip_forward = 1 #关闭重定向,防止恶意用户可以使用IP重定向来修改远程主机中的路由表 net.ipv4.conf.all.accept_redirects = 0 net.ipv4.conf.all.send_redirects = 0 sysctl -p #配置生效 --- ##启动服务 strongswan start #启动服务 strongswan status #查看服务 strongswan stop #停止服务 或 systemctl start strongswan systemctl status strongswan systemctl stop strongswan --- #OpenSwam https://www.mtyun.com/library/how-to-configure-ipsec-vpn-on-centos6 ##安装OpenSwan yum -y install openswan  ####注意:安装完毕后,可以看到实际安装的版本为Libreswan3.15 , 是因为最原始的OpenSwan已不再更新 ipsec --version #查看版本 ipsec verify #查看是否正常 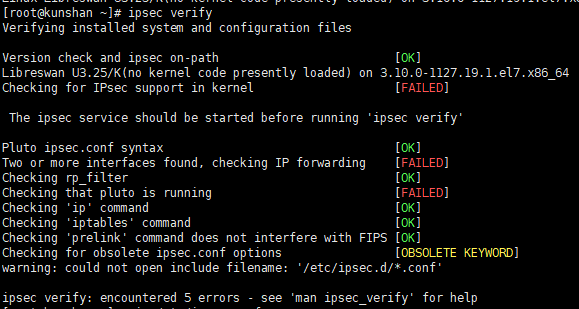 --- ##修改参数 #rp_filter参数用于控制系统是否开启对数据包源地址的校验 vim /etc/sysctl.conf #内容: net.ipv4.ip_forward = 1 net.ipv4.conf.default.rp_filter = 0 net.ipv4.conf.eth0.rp_filter = 0 net.ipv4.conf.eth1.rp_filter = 0 ##关闭icmp重定向 sysctl -a | egrep "ipv4.*(accept|send)_redirects" | awk -F "=" '{print$1"= 0"}' #将以上内容写入/etc/sysctl.conf sysctl -p #使内容生效 ipsec setup start #再次检查 ipsec verify 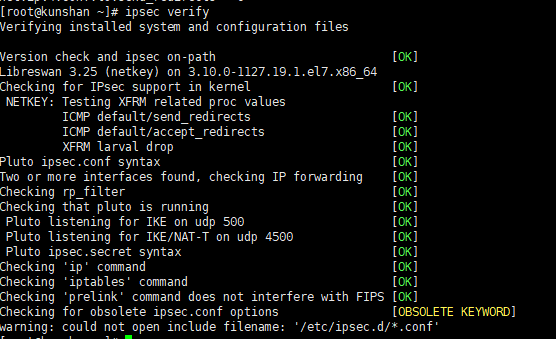 --- ##编辑配置文件/etc/ipsec.conf vim /etc/ipsec.conf #内容: version 2 # basic configuration config setup # which IPsec stack to use, "netkey" (the default), "klips" or "mast". # For MacOSX use "bsd" protostack=netkey //使用2.6内核内建模块netkey,2.6以下是KLIPS模块 nat_traversal=yes virtual_private=%v4:10.0.0.0/8,%v4:192.168.0.0/16,%v4:172.16.0.0/12,%v4:25.0.0.0/8,%v4:100.64.0.0/10,%v6:fd00::/8,%v6:fe80::/10 dumpdir=/var/run/pluto/ logfile=/var/log/pluto.log //log location conn net-to-net authby=secret //使用预共享密钥方式进行认证 type=tunnel left=101.236.50.21 leftsubnet=10.0.1.0/24 leftid=@test1 //一端的标识符,可以任意填写,如果多个连接需要区分 leftnexthop=%defaultroute right=203.76.211.83 rightsubnet=192.168.0.0/24 rightid=@test2 rightnexthop=%defaultroute ike=aes256-sha2_256;modp2048 phase2alg=aes256-sha2_256;modp2048 auto=add //add代表只是添加,但并不会连接,如果为start则代表着启动自动连接 --- ##两台主机是完全相同的配置,可以直接将ipsec.conf的配置文件scp 到另一台gw server上 --- ##生成secrets 在101.236.50.21上操作: ============================================================ vim /etc/ipsec.secrets #内容: 101.236.50.21 %any 0.0.0.0 : PSK "123" #格式:“Local Ip address” “remote ip address” : PSK “your key” ============================================================ 若本身不存在/etc/ipsec.secrets ,可以执行下述命令先生成此文件: ipsec newhostkey --output /etc/ipsec.secrets --- ##同理在右侧right-gw机器上也做相应配置。 ##重启两个vpn服务: systemctl restart ipsec --- ##在其中一台主机上启动connect: ipsec auto --up net-to-net 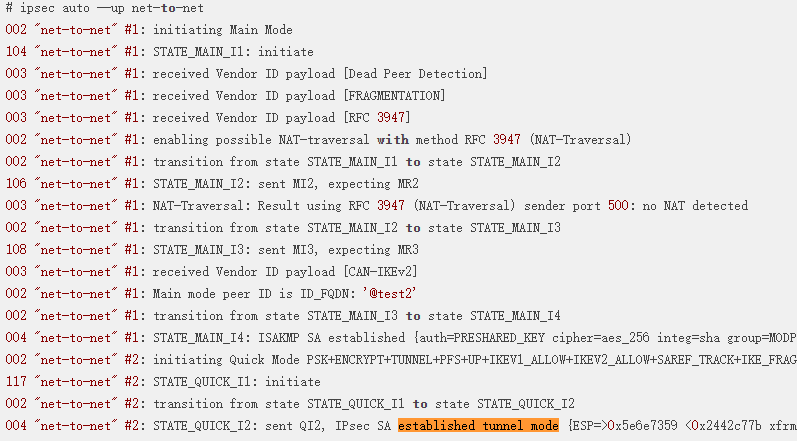 --- ##添加路由 ###在10.0.1.3 (left-client)上,执行: route add -net 192.168.0.0/24 gw 10.0.1.2 dev eth0 ## 将访问右侧子网的路由指向到左侧网关主机(left-gw) ###在101.236.50.21 (left-gw)上,执行: route add -net 192.168.0.0/24 gw 101.236.50.21 dev eth1 ## 将访问右侧子网的路由指向到本机公网IP,使之通过ipsec隧道出去 ###在203.76.211.83 (right-gw)上执行 : route add -net 10.0.1.0/24 gw 203.76.211.83 dev eth1 ## 将访问左侧子网默认路由指向本机公网IP ###在192.168.0.2(right-client)上执行: route add -net 10.0.1.0/24 gw 192.168.0.4 dev eth0 ## 将访问左侧子网的路由指向right-gw机器内网IP。 --- ##验证 ####从left-client主机 去ping right-client机器的内网IP,确认网络已打通。 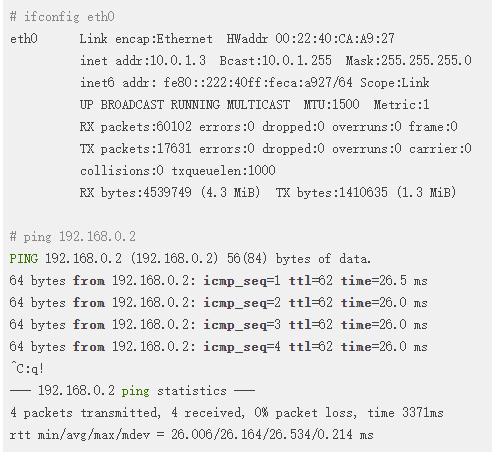
分享到: